Monday, April 25, 2016

Pop-Up Card Box Flowers' Garden


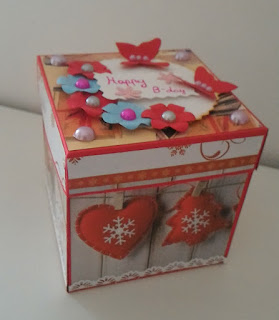
Hi Makers!!! Do you have any idea to do for the mother's day??? I have one... the Pop-Up Card Box Flowers' Garden. It's a Pop-Up card that when you open it will pop and transform into a box flowers' garden. This is my version that i invented. The beautiful things are the hanging letters (MOM). I'm sure that your mom will love this box, so follow me and let's make that!!!

⭐⭐⭐⭐⭐⭐⭐⭐⭐⭐⭐⭐⭐⭐⭐⭐⭐⭐⭐⭐⭐⭐⭐⭐⭐⭐⭐⭐⭐⭐⭐⭐⭐⭐⭐⭐⭐⭐
Materials
- cardstock for the box (choose the color that you prefer)
- 3pcs of cardstock for the layers 2,5 x 7,5cm (choose the color that you prefer)
- cardstocks for the flowers (use different colors) 
- cardstocks to make the leaves or zigzags stripes
- 7x7 cm patterned paper (to cover the 4 sides of the box)
- some patterned paper to cover the letters
- a greeting card
- ruler and cutter
- pencil and eraser
- glue
- bone folder (paper folder) and folding marker (dotter) (optional to fold easly the paper)
- decorative edge's puncher

⭐⭐⭐⭐⭐⭐⭐⭐⭐⭐⭐⭐⭐⭐⭐⭐⭐⭐⭐⭐⭐⭐⭐⭐⭐⭐⭐⭐⭐⭐⭐⭐⭐⭐⭐⭐⭐⭐
Box Template (print on B4 paper = 35,3 x 25 cm paper)


⭐⭐⭐⭐⭐⭐⭐⭐⭐⭐⭐⭐⭐⭐⭐⭐⭐⭐⭐⭐⭐⭐⭐⭐⭐⭐⭐⭐⭐⭐⭐⭐⭐⭐⭐⭐⭐⭐
watch the video tutorial


this is my version of the pop-up card box that i called "Flowers' Garden" because there's a lot of  flowers and it look likes a garden.


you can fold it and it will turn into a card, you can put it into an envelope and give it to your mom. When she open it, the card will pop-up and it will turn into a box.


the flowers are made with colorful cardstocks. i used some pastry cutter with different flowers' forms. then i add on each flower a pearl. 
The first layer is short.
The second layer is high.
The third layer is very high.
The back wall is the highest of all


on each side there's a hanging letter (MOM)


to finish a add a greeting card on the front


Thanks for visiting my website. Remember to put a thumb up and subscribe!!! Ihope you like it. More videos every sunday or monday. Bye Makers!!!


Monday, April 18, 2016

Chocolate And Greeting Card Holder


Hi!!! You need a chocolate holder and a greeting card or gift card holder for the mother's day??? Try this... the 2 in 1 holder... the Chocolate and Greeting Card Holder. It's formed with a box (the chocolate holder) and a wall with a pocket (the greeting card holder). It's super easy!!! So let's make that!!! Try it and enjoy!!

 ⭐⭐⭐⭐⭐⭐⭐⭐⭐⭐⭐⭐⭐⭐⭐⭐⭐⭐⭐⭐⭐⭐⭐⭐⭐⭐⭐⭐⭐⭐⭐⭐⭐⭐⭐⭐⭐⭐
Materials
- cardstock (choose the color that you prefer)
- 5,5 x 8,5cm white cardstock (for the greeting card) (write on it a message)
- a puncher
- a ribbon (obligatory, to pull out easly the card)
- a stripe of cardstock (to stick on it the chocolates
- chocolates
- window sheet (optional, to put on the mini window)
- 2pcs of 2,5 x 2,5 cm patterned paper
- 1pc of 2,5 x 11,5 cm patterned paper
- 1pc of 5,5 x 11,5 cm white cardstock (to put on the front of the holder)
- ruler
- double-sided tape or glue
- pencil and cutter or scissor
- paper folder and fold markerv(optional, these help you to fold easly the paper
- decorations (plastic pearls, paper balloons, ...)

 ⭐⭐⭐⭐⭐⭐⭐⭐⭐⭐⭐⭐⭐⭐⭐⭐⭐⭐⭐⭐⭐⭐⭐⭐⭐⭐⭐⭐⭐⭐⭐⭐⭐⭐⭐⭐⭐⭐
Template (print on A3 paper = 29,7x42 cm paper)


⭐⭐⭐⭐⭐⭐⭐⭐⭐⭐⭐⭐⭐⭐⭐⭐⭐⭐⭐⭐⭐⭐⭐⭐⭐⭐⭐⭐⭐⭐⭐⭐⭐⭐⭐⭐⭐⭐
watch the video tutorial


the front is decorated with a white cardstock where i wrote "Sweet choco". Then on it i stick some ballons and the top of the chocolate holder is decorated with a piece of patterned paper. 


The front of the chocolate holder is decorated with some plastic pearls.


 Then i add a window sheet on the mini window.


the wall has a pocket and it's the greeting or gift card holder. The gift card that i made is super easy to make, just get a pice of white cardstock, write on it a message, make a hole and insert in it a ribbon, then finally put it into the holder.


The box is the chocolate holder


the chocolates are sticked on a stripe of cardstock for a good presentation.


Thanks for visiting my website!!!Remember to like my videos and subscribe for more tutorial every sunday or monday (sometimes i post a new tutorial on other days)...Thanks again and i hope you like it!!!! BYE!!!


Wednesday, April 13, 2016

In N Out Folding Album (with folding pages)


Hi!!! Do you have some photos but not an album??? Well, i have one for you! Here is the most of the very simple albums in the world: the IN N OUT FOLDING ALBUM. It's an album with the folding pages in it. The closure is a simple paper stripe. Let's make that!!!

 ⭐⭐⭐⭐⭐⭐⭐⭐⭐⭐⭐⭐⭐⭐⭐⭐⭐⭐⭐⭐⭐⭐⭐⭐⭐⭐⭐⭐⭐⭐⭐⭐⭐⭐⭐⭐⭐⭐
Materials
- 31x19cm cardstock (choose the color that you prefer)
- red and pink cardstocks (for the circles)
- white cardstock (for the stripes)
- patterned paper or scrapbook paper (1pc. 6,8x18,5cm) (1pc. 6,5x18,5cm) (1pc. 10,5x18,5cm) (2pcs. 2x18,5cm) (you can also cover the "stripes" with some patterned paper)
- pencil and ruler
- cutter or scissors
- double-sided tape or glue
- 3D double-sided tape (optional)
- paper marker or dotter and paper folder (optional, use these to fold easly the paper)
- paper border's puncher (optional to add some deco to the edges of the paper)
- plastic pearls (to decorate, optional)

 ⭐⭐⭐⭐⭐⭐⭐⭐⭐⭐⭐⭐⭐⭐⭐⭐⭐⭐⭐⭐⭐⭐⭐⭐⭐⭐⭐⭐⭐⭐⭐⭐⭐⭐⭐⭐⭐⭐
Base template (this template is not printable, use this only to copy the mesurements)


⭐⭐⭐⭐⭐⭐⭐⭐⭐⭐⭐⭐⭐
Circles template (print on A4 paper = 29x21 cm paper)


⭐⭐⭐⭐⭐⭐⭐⭐⭐⭐⭐⭐⭐
Stripes template (print on F4 paper = 33x24cm paper) (you can copy it manual, there are the mesurements)


⭐⭐⭐⭐⭐⭐⭐⭐⭐⭐⭐⭐⭐⭐⭐⭐⭐⭐⭐⭐⭐⭐⭐⭐⭐⭐⭐⭐⭐⭐⭐⭐⭐⭐⭐⭐⭐⭐
watch the video tutorial


the front is decorated with some scrapbook paper. the edge of the first flap or "door" is punched with a paper border's puncher. to close it i use the method of the brad, so i use a stripe of cardstock, i add a brad and i decorated it with simple circles cutted with a zig zag scissors.


as you can see the album has 2 opening doors. opening them you can see the pages of it and some decorations, so it's a super duper simple album.


the pages are folded zigzagly, that's why i call this album "in n out" because the pages are zigzagly folded. i leave them without decorations because i give it to my friends, so she can decorate them as she want.


i add 2 stripes of border's punched cardstocks stripes (there's a template, just scroll up the page) as decoration on the two "doors" and then i add 3 plastic pearls on each stripe.


Thanks for visiting my website!!!! I hope you enjoy it!!! Don't forget to subscribe and thumb up all my videos. Sorry if i post this tutorial late, but i had some problems. Remember new tutorial videos every sunday or monday, but sometimes in other day...Thanks again!!! Have a great day!!!!BYE!!!


Friday, April 1, 2016

B-day Cake Explosion Box


Hi! Have you got some birthday gift's ideas??? I have one!!! Try this beautiful idea....the Birthday Cake Explosion Box. It's a box that when you remove the lid, the box's walls will pop out and the paper cake will be the surprise. So try this amzing and perfect gift for someone!!!

⭐⭐⭐⭐⭐⭐⭐⭐⭐⭐⭐⭐⭐⭐⭐⭐⭐⭐⭐⭐⭐⭐⭐⭐⭐⭐⭐⭐⭐⭐⭐⭐⭐⭐⭐⭐⭐⭐
Materials
- 30 x 30cm red cardstock (for the box) (you can use the color that you prefer)
- 15,2 x 15,2cm red cardstock (for the lid) (you can use the color that you prefer)
- patterned paper 
- pencil and eraser
- ruler and cutter or scissor
- glue (stick glue or liquid glue) or double-sided tape (i also use some 3d double-sided tape)
- fold marker (that what we call dotter)  and paper folder (these 2 i use to fold easly the paper)
- all the decorations that you prefer (plastic pearls, flowers, butterflies, ...)

 ⭐⭐⭐⭐⭐⭐⭐⭐⭐⭐⭐⭐⭐⭐⭐⭐⭐⭐⭐⭐⭐⭐⭐⭐⭐⭐⭐⭐⭐⭐⭐⭐⭐⭐⭐⭐⭐⭐
Box template (this template can't be printed, so just copy the mesures on the cardstock)


⭐⭐⭐⭐⭐⭐⭐⭐⭐⭐⭐⭐⭐
Lid template ( print on A4 paper = 29 x 21 cm paper)


⭐⭐⭐⭐⭐⭐⭐⭐⭐⭐⭐⭐⭐
Cake's layer's borders template (print on F4 paper = 33 x 24 cm paper)


⭐⭐⭐⭐⭐⭐⭐⭐⭐⭐⭐⭐⭐
Circles for cake's layers template (print on A4 paper = 29 x 21cm paper)


⭐⭐⭐⭐⭐⭐⭐⭐⭐⭐⭐⭐⭐⭐⭐⭐⭐⭐⭐⭐⭐⭐⭐⭐⭐⭐⭐⭐⭐⭐⭐⭐⭐⭐⭐⭐⭐⭐
watch the video tutorial


the lid is covered with some patterned paper or scrapbook paper. I added a white circle cardstock and on it i added some paper flowers and butterflies. To finish i added a very simple greeting with some 3d double-sided tape


the outside walls are covered with some patterned paper and then i glue a stripe of white cardstock


the inside walls are covered with some patterned paper


on each wall i added a circle cardstock with some words (for example "teenager". If you can see on the other walls i added some italian words because i'll give it this box to my italian cousin) and then i decorated the circles with plastic pearls, flowers and butterflies.


the true surprise is this beautiful and sweet cake. The front is decorated with some sky blue and red flowers and some cutted out green leaves.


each layer is decorated with some punched cardstock stripes as the frosting. The back part is decorated with some mini paper flower to don't leave it "empty" (without decorations)


Thanks for visiting my website!!! i hope you enjoy it!!! New videos are often every sunday or monday but sometimes other day like this tutorial (sorry for posting this tutorial lately) and don't forget to subscribe and thumb up the video!!! BYE!!!